Showing posts with label gardening. Show all posts

Thursday, January 20, 2011

Amaryllis Blooms

What an easy grow, and what a great experience. I fed it about three nights ago along with all my other plants, and the growth sped up even more. It measures about 30 inches from the soil to the flowers. The first bloom opened three days ago, and the second bloom opened yesterday. There are two more which I expect to open either tomorrow or the day after.

It adds a great splash of color in this crappy Minnesota winter and really brightens up the whole house, along with the orchids. It's so desolate and tundra-like outside that I'd nearly forgotten how beautiful flowers are. Can't wait to have this beauty out in the garden next summer, even if it's not flowering. It can store up energy for next winter, and perhaps I'll have even more blooms. :) Well worth $6.

My mother gains much enjoyment from it as well; when I come home from college each day, she remarks on how much it's grown and how beautiful it is. She acts like she doesn't like having my plants around the house, but I know she secretly loves them... :) I just can't figure out how I'm going to move my plant family down to Minneapolis when the time comes...

Anyway, the care for this plant was extremely simple, and that's probably why it's so popular. As long as it has enough light and water, it'll do just fine. I did discover, however, that the flower stalk needed to be staked after it grew to about 20". I had to loosely tie up the leaves as well, since they had grown so long they were tipping over. Overall a very rewarding and beautiful grow.

Saturday, January 15, 2011

Amaryllis (Hippeastrum?...)

I picked this one up at (where else?) Lowe's a couple days before Christmas when their Christmas merchandise was just going on sale. I chose the traditional red (I'm a traditional girl, what can I say?). It was $6 and well worth it already. I followed the directions for planting on the package, but growth was slow for about two or three weeks despite adequate watering. Then, all of a sudden, it started growing like crazy! Here's what happened in the span of 12 days, from January 3rd to January 15th.

 The thing grows 2 inches each day! I've been measuring it. It went from 15.5 to 16.5 to 18 and now to almost 20! I had to stake it yesterday, as it was falling over. I've never grown an Amaryllis before and am so far very satisfied.

Wait just a minute. I went to trusty old Wikipedia for a little info on Amaryllis and read that "It should not be confused with Hippeastrum, a flowering bulb commonly sold in the winter months for its ability to bloom indoors." What is this about??? Apparently, I have a plant from the Hippeastrum genus. Here's the link, if you're interested in reading more:

http://en.wikipedia.org/wiki/Amaryllis

Alright, then. Hey, apparently the two plants are pretty similar. I think I'll just go on calling this Amaryllis. No one will be the wiser. Okay, moving on.

This kit came with a nice pot, "compressed planting disk," and of course, the bulb. I'll share the info it came with. I'd like to give credit to the specific brand, but I only kept the portion of the package that had directions on it. I tried to find it on Lowe's website, but apparently everybody in charge there has suffered some sort of brain injury that has incapacitated them all. They have no "Amaryllis" information whatsoever. Anyway...

"1.) Place compressed planting disk in the pot provided and add 2 cups of warm water.
2.) Fluff up mix with a fork.
3.) Place your bulb into mix, pointed end up, so the top of the bulb is 1-2 inches above the planting mix.
4.) Put the pot in a warm place.
5.) Water once a week.
6.) As soon as the bud is visable, water twice a week until flowers have faded.
7.) Blooms in 8-10 weeks.

After Care: Plant the Amaryllis bulb in the garden in May and give it some fertilizer. Take out of the garden in September and cut off the leaves. Store the bulb in a cool dry place for two months. Then pot the bulb again. This plant will grow for many years."

Just for the sake of accuracy, I read up and checked on websites and read in all my garden books as well. One of my books, The Complete Houseplant Survival Manual (hardy har) gives pretty much the same information, just with more detail and with slight variation. This book uses Hippeastrum Hortorum as the scientific name, but Amaryllis as the common name. Eh, it works. It also says to fertilize it every 10 days, and I will when I water my plants tomorrow.

Update sure to come when it blooms. :)

Friday, January 14, 2011

Baby Tears (Helxine Soleirolii)


Isn't it great? My mom calls it the Afro Plant.

What a plant. If you're looking for immediate gratification, buy some Baby Tears. Last July, at the greenhouse where I plan to work this spring and summer, I drove out for their annual garage and plant sale. I picked up little else beside this plant; I had seen it before at this particular greenhouse and had always wanted one. They had one for sale in a 4 inch pot for $2, which I purchased on the spot. At home, I took it out of its plastic 4 inch pot and put it into a ceramic 4 inch, which it almost immediately outgrew. I then decided that because it was growing so fast, I would go ahead and put it in an 8 inch pot. By October or November, it had outgrown that as well and was moved into a 12 inch pot. Right now, it occupies that pot fully. I later read that Baby Tears will stay miniature if you keep it in a small pot... but too late now. I love to see it grow larger and larger, but this summer I think I'll divide it. Maybe give some away, maybe plant some in my garden. It has a great "moss" look to it, and I surmise it'll look great there, but may overtake the garden...
 However, as you can see, this plant will grow very straggly when allowed to. Some trimming with sterilized scissors will do the trick. If you want to, you can take those clippings and push them down slightly into the dirt of a new pot. It's extremely likely that they'll root, like these did:


Thursday, January 13, 2011

Pruning Iresine

¡EscĂșchame, por favor! I finally did it: I pruned that unsightly Iresine... If it dies, I'm gonna be pissed.

  1. I laid down some newspaper on the floor and retrieved standard potting mix, a large spoon, hydrogen peroxide, cotton balls, scissors, a medium-sized plastic bag, four small stakes, and some paper towels.
  2. I sterilized my scissors with a hydrogen peroxide soaked cotton ball; Cleanliness is of the essence when it comes to tip cuttings. An infection or fungus will be the downfall of any tip cuttings. It's like skinning your knee and rubbing dirt in it. You'd keep a bodily wound as clean as possible, wouldn't you? Do the same for your plants. Moving on.
  3. Iresine has plenty of nodes just below where the leaves appear. My instructions (from The Complete Houseplant Survival Manual) told me that the nodes hold cells which are capable of producing roots, and to cut just below them.
  4. I proceeded in this fashion until all that was left were the bases of the stems... it was not a promising sight.
    4. I then poked holes in the soil with one of the stakes and slid one tip cutting into each hole.
5. Lastly, I put in four stakes to support the plastic bag and slid said bag onto the plant after giving the plant a quick mist. It's sitting next to my African Violet babies near the heater and away from direct sunlight. Update hopefully soon, and yes... I'll admit if I've killed it. :/


Lastly, I noticed today that I've been getting a few views on my blog. I'd like to thank anyone out there who's read, and I'd especially like some feedback. :) Thanks again.

Flapjacks! (Kalanchoe luciae)

 
I loved this one from the minute I laid eyes on it! I was fairly new to succulents (didn't even know what a succulent was) and had never seen a plant like this before. They had a bigger plant for $9, but I chose this cheaper $4 version.

Throughout the summer, it was a great grower and not too picky about overwatering, like some succulents are (I once had a Split Rock plant which had done well until I overwatered it just a little...) Its name suits it, and mine was and is still healthy as a horse. They're native to a much warmer climate, and have bright red rims on the edges when in the strong light they crave. However, here in the good old Midwest, the sunlight isn't bright enough for it to develop that red color; instead, the plant is almost totally green. This summer, I plan to have it outside in the bright sun to give it what it deserves.

Then, in mid-summer, I couldn't resist going back to buy the much larger Flapjacks; that, too, has done surprisingly well in this colder climate, and has grown about 12-16 inches tall.

Around September or October, I saw a tiny baby offsets growing at the bases of the plants! The smaller plant only formed one offset (which is still attached to its mother), but the large plant produced about five. I decided to remove a baby from the mother and try to propagate it. I followed directions given, and the little flapjack looked okay for a few days before it began to rot (sigh...). This spring or summer, I'm going to have another go at it when the babies are larger, stronger, and have more roots of their own.

My first flapjacks plant in January 2011

My second plant in January 2011. At its base, you can see one of the offsets.


Alocasia amazonica 'polly'

I LOVE this genus. I've only got amazonica, but I've seen lots of cool varieties, like Alocasia black velvet, Alocasia cuprea, and Alocasia scabriuscula, among others. "There are 78 species of Alocasia," says Wikipedia, "occurring in Tropical & Subtropical Asia to Eastern Australia and widely cultivated in Oceania and South America." (http://en.wikipedia.org/wiki/Alocasia) I also learned from this page that you can eat the stems, but that it can "numb and swell the tongue and pharynx." However, just because you can eat it doesn't mean you should. Anyway...

'Polly' in one of my favorite painted pots.
Most of my plants have rewarded me in some way, but this was by far one of the most rewarding. As with most of my plants, this was acquired on one of my obsessive trips to Lowe's last July. :) It had many glossy, medium-sized leaves, but then fervently began shedding the old and producing monstrous new ones, with the largest being around 12 inches long. It loves humidity and moist soil, and I've got it standing on a drywell since the air is extremely dry where I live. I clean its large leaves with a damp cloth when they begin to look dusty. A very rewarding grow, but the sap is poisonous to a non-lethal extent. This was of concern to me since I've got five animals. I've got it sitting on an end table, and neither of the two cats has touched it. The cooler winter temperatures have definitely slowed its growth, but I expect a stunning emergence of new leaves this spring and summer. It should look much fuller, like it did when I first bought it:

'Polly' in May 2010
 All the leaves in this picture have since been shed and replaced with those new gigantic ones. There are only four leaves now, but I'm sure this is a normal process. I watered it correctly and gave it the bright light it loves. Feeding it only seemed to speed up the process.

Mounting Phalaenopsis

Let me start out by saying it was very silly of me to do this to an orchid in bloom; the only reasons I chose to do this at this point were 1) The orchid was almost done blooming, and 2) The orchid was unhealthy when I bought it, and I was willing to experiment with it. Also, this is another technique I learned from my orchid book, Orchid Growing for Wimps.
Though I'd snagged the last two orchid pots at Lowe's, I still needed one more after my purchase of 'aphrodite.' They had no more, and there was no place for me to find another unless I felt like driving an hour and a half away from hillbilly nowhere. I decided to attempt to mount one of my orchids! I bought a slim board and some sphagnum moss and headed on home. Since it was a two-hand project, I didn't thoroughly photo-document this journey. My orchid how-to book gave specific instructions, but I added a bit of my own flair. I was a little bored with just a plain plank of wood and wanted to add a bit of a decorative touch, so I painted a simple design of black vines on it. I then drilled two holes near the top of the board for the twine to go through as a hanging mechanism. I drilled on each side, going down the long side, three sets of two side-by-side holes for tying the flower stems in place. Then came the difficult part. I took one of my phals (the least healthy one from my Walmart rescue; I still wasn't sure I wouldn't kill it and wanted my loss to be fairly minimal) and removed most of the bark chips from its roots. I laid it down on the board and covered the roots with sphagnum moss, then wrapped the moss securely into place with twine, giving it the more country feel that my living room has. I used monofilament to tie the flower stalks into place, and the result was very pleasing to me. I gave the orchid a bit of a drink to wet the new potting medium only slightly. Here's hoping it doesn't croak!
This orchid will need daily spraying with a spray bottle, as it isn't in potting medium and can't be watered normally.

Number Four: Phalaenopsis 'aphrodite'

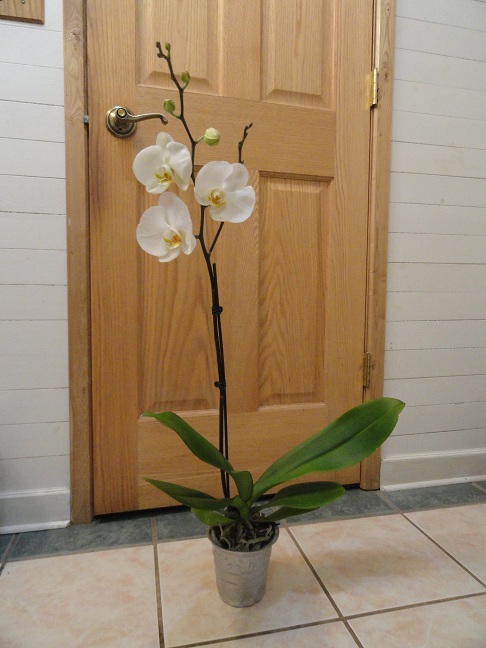
I walked into the Home Depot in a neighboring town, in search of something to mount one of my other orchids on -and let's be honest, I was curious about their plant selection. They were extremely friendly upon my entering and immediately pointed out to me that they had a new shipment of plants. They had never seen me before, so I assume that I've just taken on the appearance of a garden nut. Anyway, I noticed almost right away a HUGE cart of Phals, which I proceeded to ooh and ahh over. I told myself that A) I had no room for another Phal, B) My next orchid purchase should be another species, and C) That gigantic one with the humungous blossoms did NOT have my name on it. I drew myself away from the cart several times, but I kept coming back. On my third time back, one of the employees inquired about my fondness for the epiphytes. As soon as I realized I could converse with him about orchids, I ran my mouth up and down until I had thoroughly talked his ear off. I did, however, make an inquiry as to how the Home Depot cared for these plants. He replied that they followed the directions on the tags, giving them each 3 ice cubes every week (These plants were Just Add Ice Orchids; all of my phals have been Just Add Ice. It seems to be the only kind commonly found here). I inspected their soil and roots and was thoroughly satisfied, especially after my horror at the state of the Walmart orchids. The kindly employee also informed me that these plants had recently been marked down from $24 to $12, and I nearly fainted on the spot, what with the enormity of the plants. I knew I'd be coming back for the largest one with the huge, white flowers (after all, I didn't want to let the plant freeze in the car in the -15 weather while I ran my errands) After I had been over to various other places in town, I came back for it. They packaged it up very neatly in a brown paper bag seemingly suited for transporting orchids. I was delighted and will probably go back to the Home Depot for most of my orchid needs... :) It spent the ride home on the floor of the backseat, neatly and safely wedged in place.
At home, I thoroughly photo-documented the plant (as I do for future reference) and thought it'd be fun to take its measurements. It was the largest Phal I'd ever seen, though I'm fairly inexperienced. The flower stalk measured 34" -almost three feet! The largest leaf was 13" and the blooms were 5" across.
The bloom measures slightly less that 5" in this picture because of the curve of the petal.


I was surprised at the size of the buds as well. My thumb size is about a 6. The bud measured about an inch and a quarter.


Wednesday, January 12, 2011

Phalaenopsis Rescue


Let me begin with something simple: DO NOT, UNDER ANY CIRCUMSTANCES, TAKE A CHANCE ON AN ORCHID FROM WALMART. Sure, Walmart's great. We all love Walmart. I love Walmart, too. Hell, they have everything. That's the problem; in trying to do everything, their wares sometimes suffer, including the poor little phals I rescued. Obviously, the person/people working in lawn and garden didn't know how to care for them; this isn't their fault. Walmart doesn't specialize in plants. And if you do choose to buy from Walmart, buy one as soon as the shipment comes in. In other words, before they have a chance to do anything potentially harmful to it.

My two phals airing out on the table.


As I mentioned in my previous entry, I purchased several plant books before making a trip to the local Walmart to check out their selection of phals. I studied up on orchids in general and started to feel more like I knew what I was doing. Where I live, there are two basic places to buy plants in winter: Walmart and Lowe's. Most of my plants have come from Lowe's, and I've found them to be of better quality than Walmart's. However, Lowe's still has its issues, like having plants infested with gnats (believe me, that was super fun to remedy). I did some research online to find orchid vendors in my area; the nearest was quite a drive away, and prices were a bit too high for my comfort. It was then that I remembered Walmart had gotten a shipment of orchids in time for Christmas, and I figured they would be on sale since the season was over. However, I knew I wouldn't be getting the cream of the crop; I wanted a challenge, though, and was willing to nurse one back to health. When I arrived, they had only 6 or 7 phals left, most of which looked pretty shoddy. I picked out the largest and healthiest-looking of the group, a specimen with white flowers speckled with magenta. It was then I spied something unusual: A smaller plant with peachy-pink colored flowers, though those flowers didn't look typical of Phalaenopsis. The petals weren't round, and the flower itself was much smaller. However, the rest of the plant looked like a phal, so I wonder if it could be some sort of hybrid (any answers would be appreciated!). Though I found this plant to be unique from the typical phal, it was obvious that something was very wrong with it; on top of the potting soil, I found 17 buds that had dropped off, and its aerial roots were shriveled at the tips. I knew from reading my book that this meant one of two things: underwatering or overwatering. Both plants were also in tiny containers which had no drainage holes or ventilation necessary for orchids. I bought both anyway at $16 each and carefully wrapped the tops with large shopping bags to carry out into the -20 degree weather! I made sure they had plenty of heat for the ride home and took them into the house immediately.

It was then that I began a more thorough inspection. After freeing them from their protective plastic, I examined the roots more closely; definitely something wrong. I felt the top of the bark chips they were planted in and discovered it was totally soaked. Panic! I carried them one by one out to the bathtub to remove them from their containers. As I carefully tilted one of them onto its side to pull it out, water came gushing from the pot. The chips were totally waterlogged, and the larger plant was unbelievably rootbound. I gingerly removed as many of the bark chips as I could before laying both plants out on the table to get a little air. I'm not sure if this would be recommended by a professional, but it seemingly worked for me. I gave them about two hours to dry out a little and get some ventilation. In that time, I went out to buy them proper orchid pots, and I was in luck since Lowe's had only two left. However, I set those pots aside once I got home to give myself an opportunity to paint them, as I love to do. :) Instead, I potted the orchids slighly loosely in normal pots with drainage holes, using standard orchid mix (bark chips). I plan to get them into their more suitable pots soon, but I don't want to keep traumatizing them with transplanting, especially in bloom. I set up a drywell on the table, cleaned their leaves, and gave them a rest for the night. This morning, I spritzed them with a little water and gave them a tiny drink as well. They seem to be doing just fine so far! 


The unique phal I picked up.

Both my phals on the kitchen table.
 
The roots of the healthiest phal.


Just some of the shriveled roots of the second phal.


Propagating African Violets

One day about a month ago, I was messing around with my plants in the windowsill when I knocked off a gorgeous, healthy leaf from one of my African Violets. I was sick about it, so I decided I would try to propagate it. I didn't have much hope at first since I'd tried to propagate a leaf from S. 'melodie' last summer without success. Add to that, there was hardly a stem to speak of on the leaf I knocked off. I stuck it in the dirt as best I could anyway, gave it a little spritz, and covered it with a plastic baggie. I placed it on the counter near (but not too near) a heater, where it could get just a little bit of light from my south window. I was surprised when it didn't rot, and even happier when I noticed recently that roots had begun to form.


After my success with this leaf, I thought it was worth a shot to propagate S. 'melodie', which hasn't been looking so good in the past couple months. I worry it might continue downhill, so perhaps it was best to take a couple of the healthiest-looking leaves to propagate. That was exactly what I did. (This propagation was before the drastic surgery I performed in removing 30 leaves).

I sterilized a paring knife with hydrogen peroxide before cleanly slicing off two leaves. They were small, as all of the big leaves are steadily fading.
I then stuck the leaves in dirt, spritzed them a tiny bit, and slid a plastic baggie over each one.
The other day, I was delighted to find that they all had rooted!

African Violet - S. 'melodie'

I couldn't resist passing this plant up when I saw it in Lowe's: It was wonderfully majestic, with frilly white-and-purple flowers. I picked it up for around $9 last May, and it treated me to about a month of blossoms (though I suspect it had already been blooming for quite awhile). It stayed in its majestic condition for the entire summer, and in September -along with my other Africa Violet- it began to grow buds. Though the flowers were gorgeous, for some reason the purple streaks on the petals weren't quite as vibrant as before. I wonder if that could be due to lack of fertilizer, poor MN sunlight, or something of the like? Again, I didn't take pictures of its second glorious bloom. I only have a photo from June or July when it was at the end of its first bloom. Not the most flattering picture, I know, but it's the best I've got. (Love the paint in my old bedroom; thankfully, it's lavender now.)
 Around November, I began to notice that 'melodie' was deteriorating in a serious way. The first two rows of leaves were rotting and turning brown, and some leaves had light green spots. I've inspected it for pests, but I've seen none. I've always been very careful about underwatering and overwatering, and I haven't kept it in a place where the sun could burn the leaves, which is very unlikely in the Minnesota winter. It was in a north window, but I changed it to a shaded south window. I wonder if it could be the cold... Temps here this winter have ranged from the 30's to the -30's, but the north windowsill temps range from about 58-72, depending on the time of day. Temps in the south window range from about 68-78, so I think this may have been the problem. African Violets like normal room temps. However, my other violet was sitting right next to 'melodie' and is doing perfectly fine. My mother and I surmised that 'melodie' might just be old, but I did what I could to save it! Here are some photos of the damage done:


By this point, I had little hope for my once-majestic 'melodie', the African Violet which once gave me gorgeous, frilly white, purple-streaked flowers. The outer 2-3 rows of leaves had begun to turn brown, and I felt the prognosis wasn't very good. The previous day, I had taken two of the healthiest leaves to propagate, so I thought I would experiment... With reassurance, I took a sterilized paring knife and began to cleanly slice off ALL leaves which had brown on them, re-sterilizing between slices. I ended up cutting off over 30 leaves, and I worried slightly whether or not the plant could take the shock.

When I cut off one of the largest leaves, I noticed there was a tiny baby leaf sprouting from its base. I kept this leaf and one more sort-of-healthy leaf to propagate. The rest went in the garbage, much to my distress. I checked up on the original 'melodie' from time to time, and it seemed to be doing great. No signs of infection, which was my main worry, and the "pruning" has stimulated the plant to grow; it has new buds coming up!

African Violet - Purple

African Violets may well be the most popular and easiest houseplant, and the most beautiful as well. Their praise is well-deserved; mine have rewarded me several times with gorgeous blooms. But anyway, I picked this one up at a local swap meet, which I mentioned in my previous entry. It was a stringy, leggy little thing for quite awhile, and I have to admit that it was my least favorite.
This is what my baby African Violet looked like around the day I bought it:
I couldn't resist that cute little turtle; my mom's had it for years.
I also paint all my own ceramic pots. This is one of the first I did.

Though I might not have liked it too terribly much, it was very healthy and grew like a champ. It began to fill out and formed several different rosettes, instead of the usual one. Around September, I noticed it had begun to grow buds! After several days, I noticed that they were purple. It's still giving me gorgeous blooms after four months. I thought up until recently that it was finishing blooming, but I noticed a whole batch of new buds coming up! It still doesn't look the way a store-bought plant would, but it's full and lush. I wish I'd taken photos of it in all its splendor, but all I have are a couple photos taken recently. This plant currently isn't in one of my painted pots.
 It ended up blooming from each of its 3-4 rosettes. Here are some of the last blossoms: